Sharing / Publishing Poll - Poll Help
Sharing via a Link
You can share your Poll via a link (URL) which can be emailed or posted to a website, Facebook, Twitter etc... These links are permanent and will not be removed unless you decide to delete your poll or unless the poll is found to be in breach of our Terms.
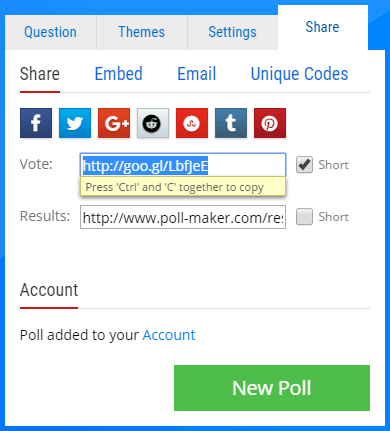
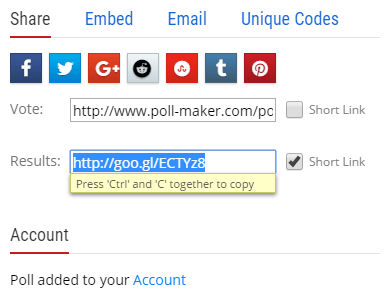
Once you have created your poll, use the orange 'Create Free Poll' button at the bottom to save it and you will be taken to the 'Share' tab. Click in the box next to 'Vote' and copy the link.
Short Links
For your convenience links are automatically shortened using Googles link shortening service. This provides you with a much shorter link to remember or share - however if you wish to use the original link just untick the 'Short Link' tick box next to the link and it will be changed back into the original link hosted at www.poll-maker.com
Sharing via Facebook / Twitter
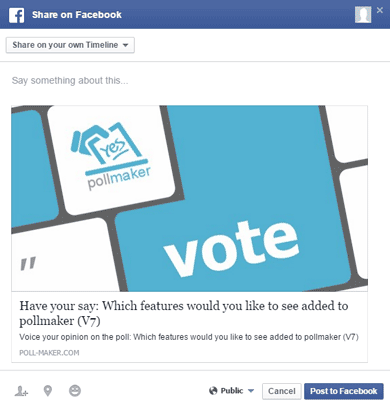
From the 'Share' section of the Share tab, after you have saved your Poll you can also share it to Facebook, Twitter, Google+, Reddit, Stumble Upon, Tumblr and pInterest.
If you don't recognize the icon for the service you wish to share to you can hover over the buttons to see the full name. Clicking the buttons will bring up a dialog that will enable you to post to that service. Make sure that the dialog is not blocked by a popup blocker if you have one (usually it will say in the URL bar of your browser if a popup is blocked).
Sharing your Public Results
On the 'Share' section of the Share tab, after you have saved your Poll, you will also find a link to your public results next to the label 'Results:'. Click in the box and copy the link, you can also use a Short Link as per the Poll Link.
This link will give you the results that your poll taker will see at the end, minus any specific Score, Grade or Outcome they personally would receive.
It is mostly useful for 'Poll / Vote' and 'Survey / Other' Poll Types, or to link just to the Comment section or Thankyou message.
Please Note: This link is the Public results link, to best see your results it is recommend to Create a Free Account and use the Account Results section where you can see all responses, filter them and download or print your responses.
Embed your Poll in a website
It is possible to embed your poll directly into your own website or blog. To be able to do this your website or blog needs to allow you to post SCRIPT tags to it - if the system you use to host your website or blog strips out or blocks you from posting SCRIPT tags then the embed code will not work.
If posting the code as you usually do doesn't work, many systems have a separate section where you can directly add HTML code, check the reference and help sections of the system you use and look for words like 'Source Code', 'HTML' or 'Advanced'.
Getting your Embed Code
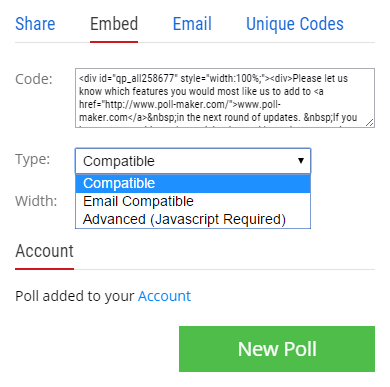
On the 'Share' section of the Share tab, after you have saved your Poll, you will find a blue 'Embed' link at the top of the tab - click it to go to the Embed section. The box labeled 'Code' contains the code you need to post to your website or blog. You can also use the controls under the code box to change how your Poll is embedded as explained below.
Embed Types
Compatible: This is the default option and the most likely to be the best option for you. It will work on almost all websites and blogs by automatically falling back to a compatible version of the code if your website/blog blocks the advanced fun
Email Compatible: The email compatible code is perfect for using in any email software that allows the sending of HTML (most of them). If you are unsure how to send HTML in an email check the Help section of your email software. If you use this code the actual poll itself will be embedded in your email and your voters can just click the answer they want to submit their vote (the 'Vote' and 'Results' buttons are not needed). If you want to track who has voted via email you can do so with Email Tracking.
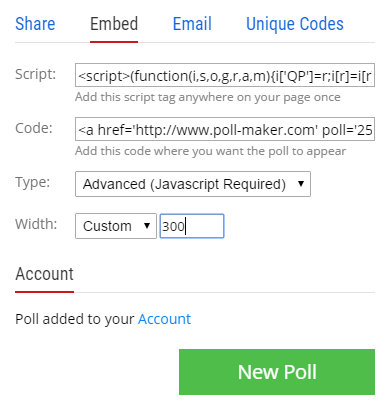
Advanced: The 'advanced' option will give you two sets of code to add to your website. You only need to add the 'SCRIPT' code once on your web page and then can embed the 'Code' section for as many polls as you like. The advantage of the 'Advanced' code is that it will automatically update as you make changes to your poll and you will not need to re-paste the embed code for every change.
How does it work
If a Poll is embedded in your website it will attempt to load our SCRIPT file to manage the poll and allow the voter to stay on your page as they vote and view the results. If the SCRIPT file is not able to load then the poll will fall back to compatibility mode and still allow the voter to post their vote, however this will need to open up a new window to display the results.
Below are some of the main reasons for the SCRIPT file not loading if you are having a problem:
- Your website management software may block the posting of the SCRIPT tag in the embed code. Often you can get around this by checking the Help section of your website management software and there may be a solution there.
- Your visitor may have an extension that blocks Javascript on their browser
- Network difficulty at your visitors end may be preventing the proper loading of the SCRIPT file (we use a 100% Uptime CDN so it is never at our end).
Embed Width
Set the width as a percentage of the section it is embedded in, or choose custom and enter your own width. Auto will choose the width based on the width of the area the poll is embedded in.
Sending your Poll via Email
If you wish to email your poll to voters and/or track which email addresses have voted you can do so directly from the poll creator. You can also use this email system to send automatic reminders and thank you emails, track who has and has not voted and track what people have voted for.
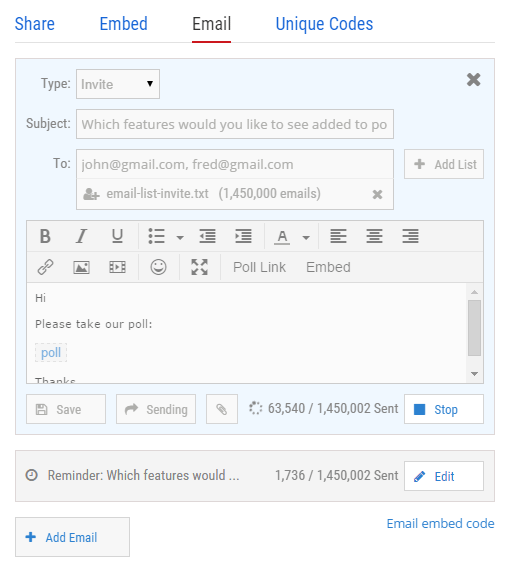
Access the email section by clicking 'Email' at the top of the 'Share' tab. You will initially be presented with 2 automatically created emails (an Invite email and a Reminder email). You can click 'Edit' to modify these or add more emails with the ' Add Email' button.
For each email you add you can choose if it is:
- an Invite to take your poll which you can send immediately, or later at your convenience.
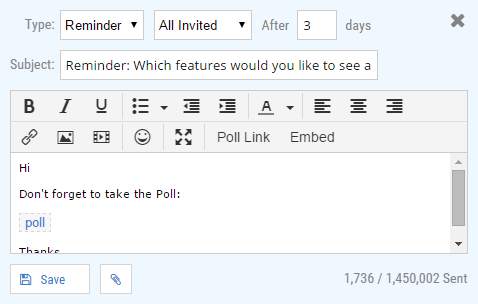
- a Reminder to take the poll which will send automatically to all people who haven't already voted (after an amount of days that you specify).
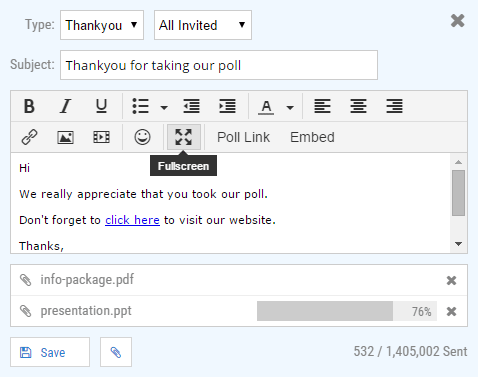
- a Thankyou email that will send automatically immediately after a voter has voted on your poll.
Sending Emails
There are no limits to how many emails or recipients you can send to. You can click 'Add List' to upload email addresses in a list separated by comma, new line or semicolon. The file must be of the type 'txt' (Plain Text File) or 'csv' (Comma Separated Variable File) - you can export to these file types from almost every Software Package, including Microsoft Excel, Word and Outlook.
If you have over 100,000 recipients for one email, it is recommended that you upload lists of email addresses in files no larger than 100,000 email addresses per file.
Please Note: You will need to verify your email address before sending any emails (you will automatically receive an email with a verification link that you can click). In addition, our system sends out your emails in batches and automatically monitors the response and vote rate of your polls - if your response and vote rate falls below our minimum acceptable level we will review your emails and all abusive or spam emails will get your account permanently banned and your polls removed.
After you click 'Send'
After you have clicked 'send' you can close the browser window and your emails will still be sent - click 'Stop' to stop the sending of your emails. It can take a few minutes to start the sending process due to the verification and monitoring processes (to prevent SPAM) so don't be dismayed if the 'Sent' count does not start to increment immediately.
Sending via your own email service
If you want to use your own email service you easily can by copying and pasting the Email Compatible Embed Code into your email from the Embed section of the 'Share' tab. You can also add tracking codes and track who has voted and download their exact votes or view them live.
Sending Reminder Emails
Click 'Edit' to edit an email and change the 'Type' drop down to 'Reminder'. Some new settings will appear where you can set to send the reminder email to everyone who has been invited (All Invited) or to add your own custom list to send this reminder email to. You can also choose how many days later they receive the reminder. These days are counted per email address from when the original invite email was sent to each individual recipient. This means for example, that if you add a new 'Invite' email and send it to 'John Smith' 2 days after sending your original invite and your 'Reminder' email is set to 2 days later. Then 'John Smith' will recive his 'Reminder' email exactly 48 hours after he receives his invite (which will be 4 days after you sent the original invite).
If you use a 'Custom List' to send the reminder email to, you will still need to make sure those recipients have already been invited via an 'Invite' email as well. However the 'Custom List' fun
Sending Thank You Emails
Click 'Edit' to edit an email and change the 'Type' drop down to 'Thank You'. You can then choose to send to 'All Invited' or a 'Custom List'
If you use a 'Custom List' to send the thank you email to, you will still need to make sure those recipients have already been invited via an 'Invite' email as well. However the 'Custom List' fun
Using the email editor
Click 'Edit' to the right of an email to modify it. The email editor will appear with a toolbar that contains basic rich text editing fun
There is also a full screen button that will expand the editing window to the full browser window size for easier email editing. Click the button again to go back to normal size. You can hover over each button icon to see a description of what it does.
There are two special buttons for adding your poll to the email (it will be added by default anyway, but in case you delete it).
- Poll Link will add the link to your poll into your email at the current point that the cursor is. In the editor the link will appear as a blue box that says 'link' and it can be deleted just like normal text. At the time of sending the system will change the blue 'link' box into a link to your poll that contains tracking codes to track the recipients vote.
- Embed will add a blue box that says 'poll' at the current point that the cursor is. At the time of sending the system will change this blue 'poll' box into an email compatible version of your poll itself that contains tracking codes to track the respondents vote. Your recipients can then just click the option they wish to vote for and their vote will be recorded. The poll is formatted as compatible HTML which works in all current email software and almost all older software too.
Reporting on email voters
To find out what people have voted for you can Download your results to Excel, CSV or HTML. The normal results will contain the email address of your voters.
In the Export dialog you can change the results drop down to Email Report to see a list of all 'Invite' recepients with the following columns:
- Status: If they have received the invite, visited the poll or voted.
- Visited Poll: The date that they first visited the poll.
- Vote Count: How many times they have attempted to vote on your poll (multiple votes will be filtered based on your Security settings).
- First Vote: The date that they first voted on your poll.
You can also see the email addresses of voters in your live individual voters reports.
Using the email text field as well
You can also easily combine emailing your voters with publishing a link and asking voters for their email address. If you add an email question to your poll it will automatically be hidden and recorded when someone votes via an email (so they won't need to enter their email address).
Protect your poll with Unique Codes/Links
You can protect (and track) your poll with special unique codes. You can give these codes to your voters to control how many votes per code and track which codes have been used. Voters will not be able to access your poll without a unique code.
You can also download the codes as short unique links that you can send to voters so that they can access the poll without having to enter the code manually.
Creating your Unique Codes
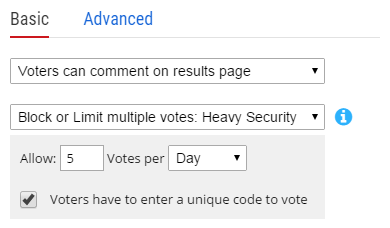
To setup unique codes, first you need to change your security settings from the 'Advanced' section of the 'Settings' tab.
- Click on the 'Settings' tab and then click 'Advanced' in the top right
- Change the 'Security' drop down list from 'Allow multiple votes per person' to 'Block or Limit multiple votes: Light Security'
- A grey box will appear under the drop down list with more options
- Click the tick box 'Voters have to enter a unique code to vote'
- Select how many votes are allowed and for what time period
- Click 'Save Poll' to update your poll settings and then click on the 'Share' tab
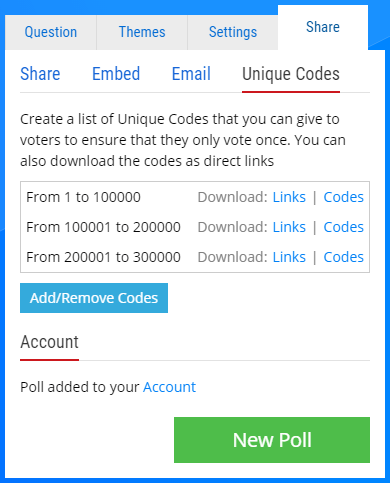
- Click on 'Unique Codes' from the 'Share' tab
- Click 'Add/Remove' Codes and enter the total amount of codes you will need. You can add more codes at any time
Please Note: If you add more codes by increasing the amount this will not change the original codes. If you set a lower amount then codes after that amount will become invalid. - Click the download links to the right to download your codes (or to download the codes as unique links). If you have more than 100,000 codes then the codes/links will be split up into multiple files of up to 100,000 codes each.
Once you have setup Unique Codes your poll will be secured via the codes and voters can reply multiple times from the same computer/location as long as they have a valid code (that hasn't already been used to vote more than you have allowed).
Using the Unique Codes
Your voters will need to enter a code you have given them to use your poll. Their vote will then be tracked alongside that code and you can see which vote belongs to which code by exporting your votes.
If you click 'Links' to download your codes as unique links then your voters can click the link to go to your poll and they will not have to enter a code.
